How Can Professional Leaded Glass Repair Transform Your Historic Home or Building?
Understanding Leaded Glass and Its Vulnerability to Damage
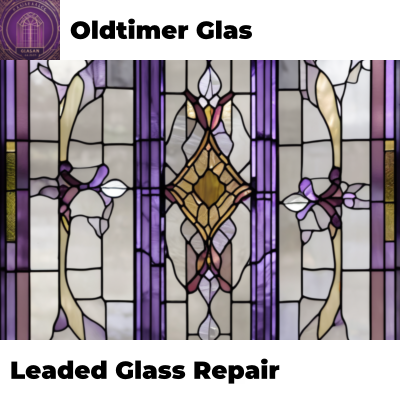
Leaded glass represents a fascinating intersection of craftsmanship, artistry, and architectural heritage. These intricate assemblies, composed of individual pieces of colored or textured glass held together by lead came—strips of lead shaped into an H-profile channel—have graced homes, churches, and public buildings for centuries. The lead framework provides both structural support and aesthetic definition, creating the characteristic geometric patterns that make leaded glass instantly recognizable. Yet this very composition, while beautiful, introduces specific vulnerabilities that demand specialized attention when damage occurs.
The material composition of leaded glass installations creates particular challenges for restoration. Lead, despite its strength, becomes brittle over extended periods, especially when exposed to temperature fluctuations, moisture, and atmospheric pollutants. The solder joints connecting pieces of lead can crack or fail, compromising the entire panel's integrity. Glass pieces themselves may develop stress fractures from settling foundations, wind pressure, or simple thermal expansion and contraction cycles that occur throughout seasons and decades.
The Nature of Lead Came Deterioration
Lead came undergoes predictable degradation patterns that experienced restorers recognize immediately. The surface develops a characteristic gray patina as lead oxidizes—this patina actually provides some protection against further corrosion. However, beneath this protective layer, the lead can develop internal weaknesses. Water penetration around failed solder joints creates particularly destructive conditions. Moisture trapped within the lead matrix can freeze during winter months, expanding and fracturing the lead from the inside outward. Additionally, acid rain and industrial pollutants accelerate the oxidation process, weakening structural integrity.
Common Glass Fracture Patterns in Leaded Installations
Glass breakage in leaded assemblies rarely occurs randomly. Instead, fracture patterns reveal the stresses acting upon them. Stress fractures typically radiate from a single point, indicating localized pressure or impact. Thermal stress fractures appear as relatively straight lines, often running parallel to lead lines. Impact fractures feature more chaotic branching patterns. Understanding these distinctions proves crucial because each pattern demands different restoration approaches. A thermal stress crack might require careful re-leading of the affected section, while an impact fracture might necessitate individual glass piece replacement.
The Restoration Process: What Happens Behind the Scenes
Professional leaded glass repair demands extensive knowledge spanning multiple disciplines—metalworking, glass work, chemistry, and architectural history. The process extends far beyond simply replacing broken pieces. Comprehensive restoration requires systematic assessment, careful documentation, skilled disassembly, meticulous repair or replacement, and thoughtful reassembly.
Oldtimer Glas approaches each project with this comprehensive methodology. The restoration journey begins with thorough evaluation and documentation. Specialists examine the entire installation, photographing existing conditions from multiple angles. They identify all visible damage but also probe for hidden problems—loose joints concealed by paint or patina, glass pieces held in place only by painted lead joints, deteriorated mortar in exterior installations.
Initial Assessment and Documentation Phase
The assessment phase establishes the foundation for all subsequent work. Skilled technicians:
- Photograph each panel systematically, creating a permanent record of its condition before any intervention
- Test lead joints by gentle manipulation, determining which connections retain structural integrity and which have failed
- Examine solder quality and extent of joint failure
- Assess glass condition, noting hairline fractures invisible to casual observation
- Evaluate any existing repairs, determining whether previous interventions have held or created new problems
- Document the lead profile thickness and composition when possible, as this information guides replacement material selection
This documentation phase transforms abstract damage into concrete specifications that guide restoration. When craftspeople understand exactly what they're addressing, they can apply precisely calibrated solutions rather than generic approaches that might inadvertently cause harm.
Careful Disassembly Without Additional Damage
Disassembling leaded glass requires patience, precision, and an almost meditative approach to the work. The goal involves separating components while preserving everything possible for either reuse or return to the client. Technicians cannot simply yank apart lead joints. Instead, they employ specialized tools designed to gently separate the lead came without stressing glass pieces.
The dismantling process follows careful sequences:
- Solder joints are carefully heated to their melting point, allowing joints to separate cleanly without mechanical force
- Lead came is gently worked away from glass, employing tools that distribute pressure across a wide surface area
- Any paint layers are assessed for historical significance before removal
- Each glass piece receives careful handling to prevent chips or additional fractures
This meticulous approach takes substantially longer than careless disassembly but preserves options for restoration. Original glass pieces, even those with damage, often possess irreplaceable aesthetic and historical qualities. Preserving them whenever structurally feasible honors the original craftspeople's work and maintains authenticity.
Identifying When Replacement Glass Becomes Necessary
Not every glass piece in a damaged leaded installation requires replacement. Sometimes careful conservation preserves original elements while addressing only the most compromised sections.
Assessment Criteria for Glass Retention Decisions
Several factors influence whether original glass warrants preservation or replacement:
- Structural integrity - Does the crack threaten the piece's ability to remain in place?
- Aesthetic impact - Does the damage significantly detract from the installation's appearance?
- Historical value - Does the specific glass possess characteristics indicating significant age or artistic merit?
- Repair feasibility - Can cracks be sealed or stabilized without compromising appearance?
- Original glass availability - Can matching replacement be sourced, or does preservation become imperative by necessity?
Authentic antique glass displays characteristics that modern glass cannot replicate. The subtle color variations, surface irregularities, light refraction patterns, and even the specific impurities that give antique glass its distinctive appearance prove impossible to manufacture synthetically. When original glass survives structurally intact, preserving it maintains the installation's historical authenticity and aesthetic value.
Finding Compatible Replacement Glass When Necessary
Sometimes glass must be replaced. Perhaps a piece has shattered completely, or structural failure necessitates removal. Finding appropriate replacement becomes a specialized hunt through architectural salvage networks, specialty glass suppliers, and sometimes international sources.
Matching replacement glass requires considering:
- Color - Not merely the hue, but its tone, saturation, and variation
- Texture - Whether the surface is smooth, rippled, hammered, or otherwise textured
- Opacity - The degree to which light passes through clearly versus diffusely
- Thickness - Period-appropriate glass thickness varies significantly
- Manufacturing characteristics - Visible striations, bubbles, or other properties that indicate period-appropriate manufacturing methods
Specialty suppliers who focus on historical glass reproduction maintain extensive stock of mouth-blown and hand-formed glass designed to match antique specimens. These glasses cost substantially more than modern alternatives but prove essential for authentically accurate restoration. Mismatched replacement glass becomes glaringly obvious once the restoration completes, creating a restoration that fails aesthetically despite successful structural repair.
Lead Work and Solder Joint Restoration
The lead framework carries all responsibility for structural support in leaded glass installations. Restoring compromised lead components demands skilled metalworking combined with knowledge of how lead behaves across different environmental conditions and time scales.
Understanding Lead Came Profiles and Specifications
Not all lead came proves identical. Different periods favored different profiles, and different applications required different thicknesses and design features. Some lead came incorporates copper cores for enhanced strength. Others feature different channel widths designed for specific glass thicknesses. Understanding these distinctions proves critical because inappropriate lead selection can compromise both structural integrity and historical accuracy.
Common lead came specifications include:
- Standard "H" profile with equal-sized channels for holding glass
- Reinforced profile with copper cores for installations requiring exceptional strength
- Wide-channel profile for thicker antique glass pieces
- Narrow-channel profile for delicate, thin glass pieces
- Specially-designed profiles for specific decorative effects
When existing lead proves unsuitable for repair purposes—perhaps too brittlely deteriorated or originally of inferior quality—selecting appropriate replacement lead requires expertise. The chosen material must match not only the visual profile but also the historical and structural requirements of the specific installation.
Solder Joint Restoration and Reinforcement
Solder joints function as the critical load-bearing connections in leaded glass assemblies. Traditional solder compositions differ substantially from modern alternatives. Pre-20th century installations typically featured lead-tin solder with compositions varying between 40/60 (40% tin, 60% lead) and 50/50 ratios, depending on the period and geographic location.
Modern lead-free solders, while environmentally preferable, create compatibility issues with traditional installations. The thermal expansion rates differ, potentially creating stress that leads to future joint failure. Experienced restoration specialists understand these compatibility complexities and select solder compositions that balance environmental considerations against restoration authenticity and longevity.
Solder joint failures manifest in several patterns:
- Cold joints - Solder that cooled improperly during original installation, creating weak connections with dull, grainy appearance
- Crystallized joints - Solder that has become brittle over decades due to repeated thermal cycling
- Mechanical failures - Joints that separated due to structural stress or vibration
- Corrosion-induced failures - Solder weakened by oxidation from moisture exposure
Each failure type demands specific remediation. Cold joints might require complete re-soldering. Crystallized joints benefit from careful reheating and fresh solder application. Corrosion-damaged joints need cleaning before reinforcement. Properly executed solder work restores structural integrity while remaining virtually invisible to casual observation—the mark of truly professional restoration.
Environmental Factors and Protective Considerations
Leaded glass installations exist in perpetual dialogue with their surrounding environment. Weather exposure, thermal cycling, humidity fluctuations, and atmospheric pollutants all exert cumulative effects that eventually necessitate professional intervention.
Understanding Exterior Installation Challenges
Exterior leaded glass faces particularly demanding conditions. Temperature swings create thermal stress as glass and lead expand and contract at different rates. Moisture penetration through failed solder joints initiates cascading deterioration. Wind pressure exerts ongoing mechanical stress. Ultraviolet radiation gradually degrades certain glass colorants. Acid rain and industrial pollutants chemically attack lead surfaces.
These environmental assaults occur simultaneously rather than sequentially. A failed solder joint allows water penetration. That moisture freezes during winter, expanding and cracking the lead. The crack admits more moisture. Acid rain attacks the exposed lead surfaces. Within a few years, what began as a single solder joint failure has evolved into structural compromise affecting multiple lead joints and potentially weakening surrounding glass pieces.
Interior Installation Vulnerabilities and Prevention
Interior leaded glass enjoys somewhat gentler conditions but remains vulnerable to environmental stress. Moisture from interior humidity, particularly in kitchens and bathrooms, can penetrate joints and initiate deterioration. Temperature fluctuations, while less severe than exterior conditions, still contribute to gradual stress accumulation. Dust accumulation on interior surfaces can trap moisture against glass and lead.
Proper maintenance extends the operational lifespan of interior leaded glass installations considerably. Regular gentle cleaning with appropriate materials removes dust and debris. Monitoring for signs of deterioration—loose glass pieces that rattle when the building moves, visible cracks in solder joints, discolored areas indicating moisture damage—allows early intervention before problems cascade into major structural issues.
Why Professional Expertise Matters More Than DIY Approaches
Leaded glass repair tempts many homeowners toward do-it-yourself attempts. The appeal combines understandable economics with a desire to maintain control over personally valuable installations. Yet leaded glass restoration represents one of those specialized crafts where professional expertise genuinely matters—not merely as a matter of quality preference, but as a practical necessity for achieving durable results.
The Hidden Complexities Beneath Apparent Simplicity
From casual observation, leaded glass repair appears straightforward. The broken piece gets replaced. The loose joint gets re-soldered. Problem solved. This surface-level understanding masks extraordinary complexity lurking beneath.
Professional restorers encounter multifaceted challenges that demand specialized knowledge:
- Historical period identification - Accurately determining when an installation was created informs restoration approach, material selection, and decision-making about preservation versus replacement
- Original craftsperson intent - Understanding how original artisans designed the installation helps guide restoration choices that maintain aesthetic and functional integrity
- Material compatibility - Selecting replacement materials that function properly within the existing system without introducing new stresses
- Stress distribution - Understanding how loads flow through the structure to identify which elements truly require intervention versus which appear damaged but function adequately
- Long-term durability considerations - Choosing solutions that will endure for decades rather than merely addressing immediate visible problems
Professionals bring years of accumulated experience recognizing patterns that casual observers miss entirely. They understand that sometimes the most obvious problem isn't actually the root cause. A cracked glass piece might indicate not simple impact damage but rather underlying structural settlement that will crack replacement glass identically unless addressed systematically.
Technical Skills and Specialized Equipment Requirements
Leaded glass restoration demands technical proficiency spanning multiple specialized skills. Practitioners require:
- Soldering expertise - Creating joints that achieve proper wetting, appropriate solder flow, and maximum strength without damaging adjacent glass through excessive heat
- Glass cutting and fitting - Precisely fabricating replacement glass pieces that fit within lead came channels without forcing or leaving gaps that compromise structural integrity
- Lead working - Understanding how lead behaves during forming, bending, and joining; knowing when lead proves too brittle for safe use versus when careful work can preserve it
- Finishing techniques - Cementing joints (in traditional installations), applying appropriate patinas, and achieving finishes that age naturally and harmonize with surrounding elements
These skills develop through years of hands-on practice and mentorship. They cannot be acquired through internet research or brief instructional videos. Tools specifically designed for professional work—specialized soldering irons with appropriate wattage and temperature control, proper lead vises, precision glass cutters—represent significant investments that professionals justify through regular use but casual practitioners rarely warrant.
Risk Factors in Amateur Restoration Attempts
Well-intentioned DIY restoration frequently creates problems exceeding the original damage. Common mishaps include:
- Excessive heat application - Using oversized soldering irons or failing to control temperature, cracking glass through thermal shock
- Improper solder flow - Creating weak joints that will fail within months or years despite appearing adequate
- Incorrect lead selection - Installing incompatible lead that either proves too brittle for the application or creates structural stresses
- Glass cutting errors - Fabricating replacement pieces that don't fit properly, either too large (forcing lead joints apart) or too small (creating gaps)
- Structural misunderstanding - Addressing visible symptoms while leaving underlying structural problems unresolved, resulting in rapid failure of the repair
Each of these errors typically costs significantly more to correct than hiring professionals for the initial restoration. A professional restoration completed once and executed properly represents far better economics than amateur work requiring professional correction.
Specific Repair Techniques for Common Leaded Glass Problems
Different damage types require distinct remedial approaches. Professional restorers select techniques based on thorough assessment rather than applying generic solutions to all situations.
Addressing Lead Came Deterioration and Replacement
When lead came has become too brittle or severely corroded to function safely, replacement becomes necessary. This process involves careful removal of the compromised lead followed by installation of compatible new lead.
The lead replacement sequence typically proceeds as follows:
- Solder joints connecting deteriorated lead are carefully heated and separated
- Old lead is gently worked away from glass pieces
- Glass pieces are cleaned of old solder residue and any lead oxidation
- New lead came, selected to match the original profile and thickness, is carefully fitted around each glass piece
- New solder joints are created, connecting each piece to its neighbors
- Joint cementing (in traditional installations) seals the joints and stabilizes the structure
This process demands extraordinary care. Even small mistakes—slightly misaligned lead that forces glass out of position, excessive heat that cracks glass, solder joints that appear adequate but prove structurally weak—compromise the entire installation. Experienced practitioners work methodically, checking alignment constantly and testing joint strength before proceeding.
Panel Reinforcement When Original Structure Proves Inadequate
Some installations, particularly very large panels or those designed during periods favoring aesthetics over structural optimization, benefit from reinforcement without full re-leading. Internal reinforcement using copper wire or steel reinforcement bars, strategically placed and soldered into joints, distributes loads more effectively across the panel without altering appearance.
These reinforcement techniques require careful planning:
- Load analysis - Determining where excessive stress concentrates and where reinforcement will prove most effective
- Material selection - Choosing reinforcement materials compatible with existing lead and glass
- Integration design - Planning reinforcement placement to remain hidden while achieving maximum structural benefit
- Soldering integration - Creating solder joints that securely attach reinforcement while maintaining overall panel integrity
Professional restorers frequently employ reinforcement strategies that remain completely invisible to viewers yet dramatically extend installation lifespan, particularly for large panels or installations exposed to significant wind loading.
Careful Glass Piece Replacement While Preserving Original Elements
When specific glass pieces require replacement, professionals employ techniques that minimize disruption to surrounding original elements.
The targeted replacement approach involves:
- Careful solder joint separation - Only heating and separating joints directly connected to the damaged piece rather than disturbing larger areas
- Precise lead removal - Gently working away only the lead directly holding the damaged piece
- Minimal lead disturbance - Installing replacement glass using existing lead whenever possible rather than replacing lead unnecessarily
- Strategic new soldering - Creating solder joints only where necessary to secure replacement glass
This surgical